Furo, urushi-buro, urushi-muro, curing cabinet – whatever you call it, you need it if you are thinking about starting any urushi (urushi [漆]) work*. A furo lets you control the environment so urushi cures predictably. If you haven’t read my curing overview yet, start here first (it will make the choices below obvious): https://tamenuri.com/curing-urushi-concept-tips-qa/
- Humidity – stable and controlled relative humidity (RH). Real working ranges are not one number: roughly ~50–60% (kara-buro), ~60–70% (mild), and ~70–85% (shime-buro) depending on what you are curing and why.
- Temperature – stable and controlled temperature, typically in the workable band ~20–25 °C (or ~68–77 °F, ~293–298 K). Warmer is faster, but too warm can cause surface problems.
- Oxygen (air exchange) – urushi curing involves oxidation. A furo that is perfectly airtight can slow or stall curing. You want controlled humidity, not a sealed oxygen-free box.
- Protection from airborne dust and lint – dust in wet urushi is forever. Even a “slow” cure only works if the surface stays clean.
A furo can be extremely simple and small, but it can also be a very capable controlled curing system. Below are several practical levels of furo complexity, from “good enough to start” to “serious multi-chamber workflow.”
Basic, rudimentary furo for fuki-urushi
 If you want to lacquer a small wooden object with fuki-urushi (fuki-urushi [拭き漆]) and you do not plan to do many pieces or complex techniques, a cardboard-box furo is the cheapest and easiest option. You need: a cardboard box (with lid or flaps), a few pieces of wooden slats, a small bowl/tray for water, and (optionally) a damp rag or sponge. Choose a box larger than the piece you want to cure – a simple rule is to aim for ~2× the object’s dimensions in each direction. (Don’t go huge: big air volume is harder to humidify and stabilize.)
Put the slats and water container at the bottom, add a damp rag/sponge to boost evaporation, place the lacquered object inside, and close the lid. That’s it. In a small box, water + a damp surface can push RH into workable territory. Keep the box in a stable-temperature room (ideally ≥20 °C). Also: do not try to make this box perfectly airtight – a little leakage is good for oxygen exchange (see the curing article for why).
Downsides: it is small, easy to destroy, not great for prolonged humidity (cardboard + mold), and you cannot truly “control” RH – you are just nudging it. It can still be perfectly fine for learning and for basic fuki-urushi.
When do you need more? In two basic cases: (1) you plan to work on more/larger items, more frequently, or (2) you want to do more sensitive work (clear coats, light colours, roiro, tamenuri, etc.), where humidity/temperature stability and dust control matter much more. That leads to two options: a larger permanent furo, or a smaller but much more controllable furo.
Larger, permanent furo for fuki-urushi
Principles are the same: you need a chamber, stable temperature, workable humidity, oxygen exchange, and dust protection. For my fuki-urushi furo I use an old wooden cupboard. I got it for free from a neighbor. Because many cabinets are sealed/finished (and the wood may not buffer humidity well), I added wooden boards on the inside. Wood lining (cedar / cypress) helps stabilize humidity by absorbing and releasing moisture.
Important note: choose wood that resists mold/rot. In Japan, cypress is common; I used cedar. Make sure the cabinet is reasonably sealed (no obvious gaps), but do not obsess over “airtight.” You want stable RH, not an oxygen-starved box. If you have big cracks, seal them; if the door is sloppy, add a simple rubber seal – but avoid turning the whole thing into a vacuum jar.
On the bottom, add a rack. I used two long wood slats and an easily removable “shelf.” I can cure anything from many sets of chopsticks to bowls or even skateboards. If you want/need something bigger, a cabinet with sliding doors is much more convenient in a furo (and yes – very traditional).
 For humidity: use a water tray plus a damp rag/sponge to increase evaporation. If your interior is wood-lined, even lightly misting the walls can help (but never create dripping/condensation). If your furo sits in a cool place, add gentle heat: terrarium heating mats are great because they are stable and low-power. With larger cabinets, stability matters more than “high humidity.” Avoid big temperature swings – swings + high RH = condensation risk (surface damage).
For this kind of furo, a basic hygrometer is useful, but treat cheap ones as a rough indicator, not truth. Put the sensor inside the furo (not outside) and focus on consistency. For the deeper logic behind RH, temperature, oxygen, and film thickness, see the curing article: https://tamenuri.com/curing-urushi-concept-tips-qa/
Small furo for more demanding work
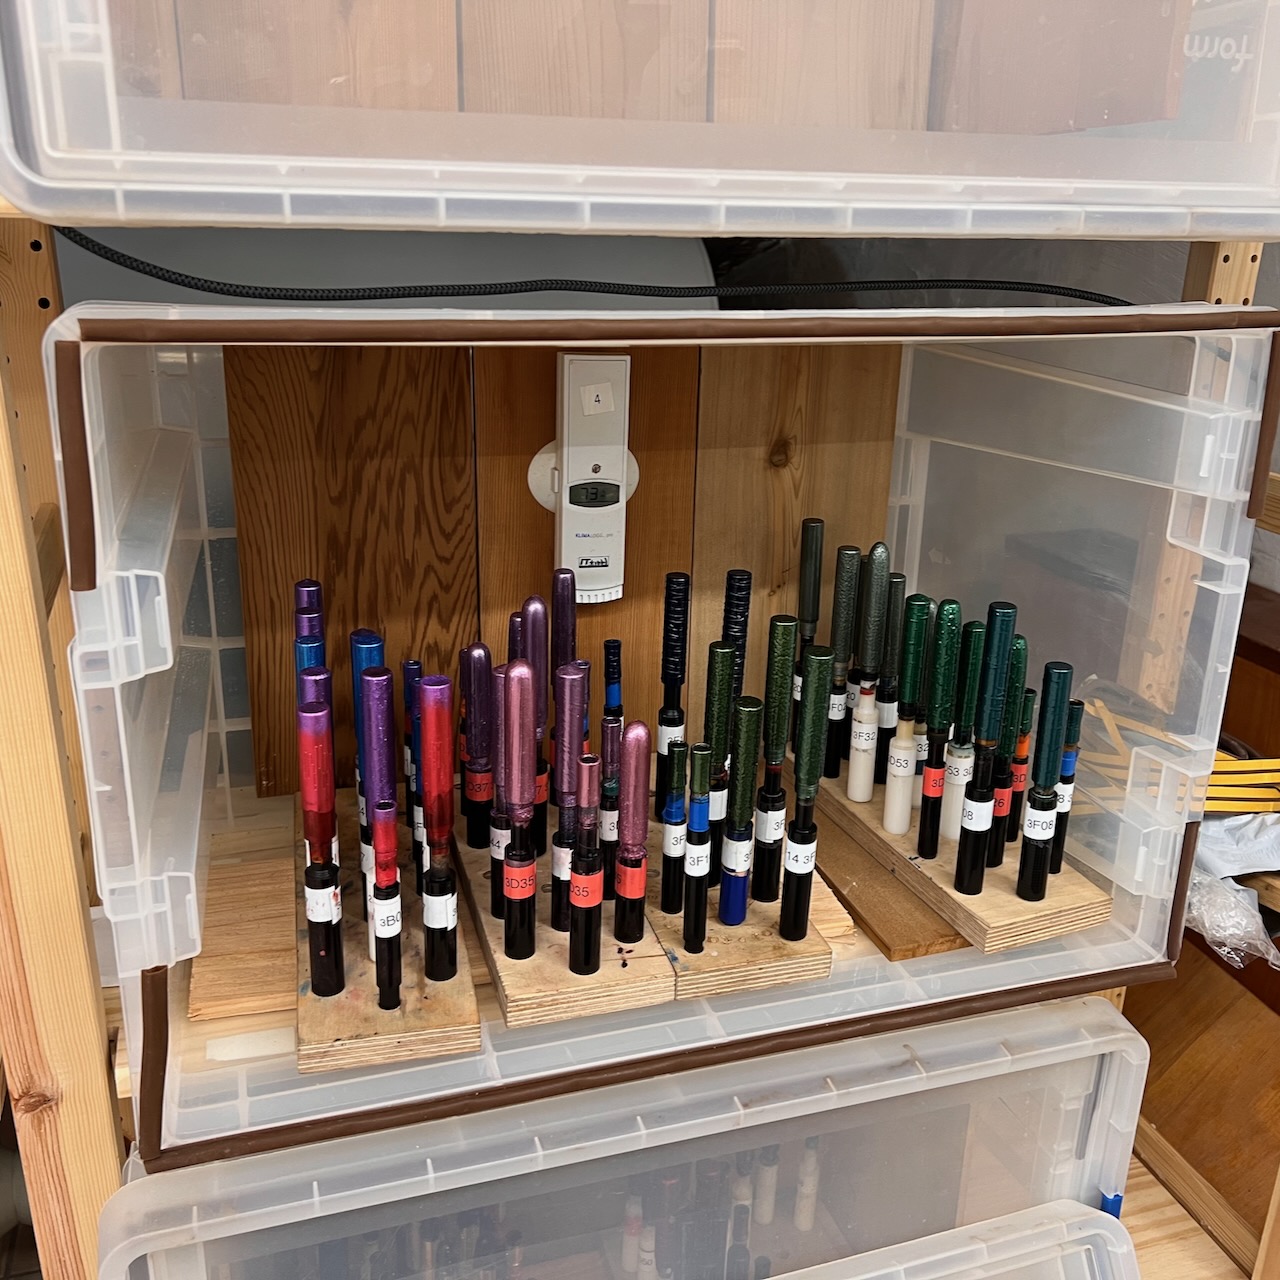
 For more demanding work, a small plastic container with a good lid is a very strong upgrade. You can set it up opening upward or on its side like mine. Lining the interior with wood is still a good idea: cypress/cedar acts as a humidity buffer and reduces RH swings. If your box is reasonably airtight, RH can drift only ~1–2% overnight – good enough for serious urushi work.
Two critical corrections vs what people often do:
- Don’t over-machine a tiny furo. Many mini-humidifiers are too aggressive for small volumes and will overshoot, spike, and increase condensation risk.
- Don’t aim for “sealed forever.” Even small chambers need some air exchange. A lid that isn’t perfectly clamped, tiny gaps, or briefly opening the box once or twice a day can be enough (details in the curing article).
 Because you will be working in narrower RH windows (especially mild humidity for clarity and light colours), a better hygrometer/thermometer combo is worth it. Cheap sensors (often marketed as “±3%” what is not true in most cases) can be wildly wrong; treat them as trend indicators. A decent unit with realistic ~±5% RH performance is enough for most work. If you are chasing narrow windows, calibrate or upgrade (again: details and why it matters are explained in the curing article).
I use a central station with additional wireless probes in each furo. I can read ambient studio conditions and each chamber quickly, which makes seasonal adjustments much easier.
Those multiple probes lead us to another upgrade:
Different parameters for different curing
In practice, “one perfect RH” is a myth. Different urushi steps want different environments. A simple, usable map (fully explained in the curing article) looks like this:
- Shime-buro (shimeshiburo [湿し風呂], shime-muro [湿室]) – ~70–85% RH, ~20–25 °C: fresh coats that must cure reliably.
- Mild humidity – ~60–70% RH (often with slightly warmer tolerance): clarity/colour preservation, longer leveling time, many transparent and light-colour situations.
- Kara-buro (karaburo [乾風呂], kara-muro [乾室]) – ~50–60% RH, ≥20 °C: holding/stabilizing after a coat is safely set, or when you want to reduce “wet time.”
If you work on many pieces and techniques at once, multiple chambers become a practical necessity. Also, you can cure the same layer in stages – for example: a mild phase for leveling/clarity, then shime-buro to ensure a reliable set, then kara-buro to stabilize before sanding/polishing. This “stage curing” idea is described in my curing Q&A: https://tamenuri.com/curing-urushi-concept-tips-qa/
Temperature stability is just as important. Automation helps (terrarium thermostats/controllers are genuinely useful). Alternatively, control the whole room climate (AC/heat). One more real-world note: high ambient humidity can make application tricky (not only curing). Stable workspace climate reduces surprises.

Next level
And this is something I am working on now: a large, dual-chamber furo made entirely of wood, in a traditional Japanese-style build, with at least one rotary shelf. A rotary shelf allows constant or periodic changes in orientation of the cured pieces, reducing the risk of sagging/flow accumulation (especially relevant when a coat is a bit too heavy). Of course, holders must be compatible (pens must not fall). I will leave the full build for future posts.
*) It is possible to cure urushi without a furo/muro – for example on larger objects (floors, panels) – but only if your ambient environment is already in a workable band for that urushi: temperature, humidity, and oxygen. In real life, ambient conditions drift, dust is usually worse than you think, and “set” is not the same as “full cure.” If you want the practical framework (and troubleshooting), use this as your reference: https://tamenuri.com/curing-urushi-concept-tips-qa/

